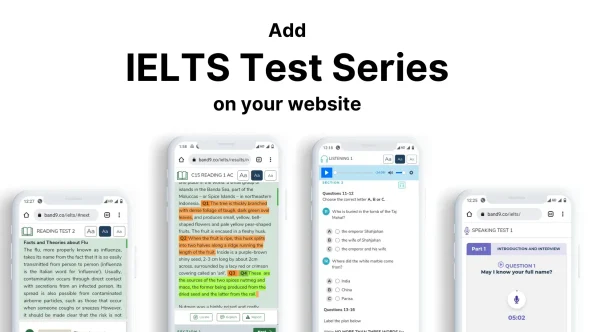
If you’re reading this article, chances are you already have an IELTS website and are looking to add a CD-IELTS test series to it, or you’re planning to launch a brand new IELTS website. Either way, you’re in the right place! This guide will walk you through how to start your website from scratch in just three simple steps. Let’s dive in.
Table of Contents
Step 1: Select a Domain and Buy Hosting
How to Select the Perfect Domain Name
Your domain name is your digital address; it’s how users will find you on the internet. Here are some tips to choose the perfect one:
- Keep It Short and Memorable: A concise domain name is easier to remember and less prone to typos. Aim for something under 15 characters.
- Use Keywords: Incorporate words like “IELTS,” “test,” or “prep” to make your site’s purpose immediately clear.
- Avoid Numbers and Hyphens: These can confuse users and make your domain harder to type.
- Choose the Right Extension: While “.com” is the most popular, “.edu” or “.org” might also fit your educational platform.
Once you’ve brainstormed a few options, check their availability using domain registrars like GoDaddy or Namecheap.
How to Buy Hosting
Hosting is where your website lives on the internet. Here’s how to choose the right hosting provider:
- Assess Your Needs: For an IELTS test series platform, you’ll need a hosting plan that offers sufficient bandwidth and storage.
- Look for Reliability and Uptime: Choose a provider that guarantees at least 99.9% uptime to ensure your site is always accessible.
- Check for WordPress Compatibility: Since we’ll be installing WordPress, make sure the hosting supports it.
- Consider Customer Support: Opt for a provider with 24/7 customer service.
Popular hosting providers include Hostinger, SiteGround, and HostGator. Once you’ve selected a provider, follow their instructions to purchase your hosting plan and connect it to your domain.
Step 2: Install WordPress
How to Install WordPress
WordPress is a versatile and user-friendly content management system (CMS) perfect for building your IELTS platform. Here’s how to install it:
- Access Your Hosting Control Panel: Log in to your hosting account and navigate to the control panel (often cPanel).
- Find the WordPress Installer: Most hosting providers offer a one-click WordPress installation under the “Website” or “Scripts” section.
- Run the Installer: Click on the WordPress icon and follow the prompts. You’ll need to set up an admin username and password.
- Choose Your Domain: Select the domain where you want to install WordPress.
- Complete the Installation: Once the setup is complete, you’ll receive a confirmation message with your login details.
Now, you can access your WordPress dashboard by visiting yourdomain.com/wp-admin.
Step 3: Install ProQyz Plugin
Why ProQyz?
ProQyz is the only WordPress plugin that allows you to add a comprehensive test series to your WordPress website seamlessly. It’s designed specifically for educational platforms, making it the perfect choice for your IELTS test series.
Setting Up ProQyz
1. Create an Account on ProQyz
- Visit app.proqyz.com and sign up for a new account.
2. Choose a Plan
- Navigate to the Plans section.
- Choose between the Starter, Growth, or Unlimited plans based on your needs.
- Click on Subscribe and complete the payment process.
3. Configure Your Account
- Go to Account Settings.
- Select Domain and add your website’s URL.
4. Download and Activate the Plugin
- Download the ProQyz plugin from your account dashboard.
- In your WordPress admin panel, go to Plugins > Add New.
- Click on Upload Plugin, select the ProQyz plugin file, and install it.
- Activate the plugin and enter your license key when prompted.
5. Set Up Essential Pages
- Go to Pages > Add New in your WordPress dashboard.
- Create two new pages:Tests: Add the shortcode [proqyz-course-grid].Dashboard: Add the shortcode [proqyz-dashboard].
- Publish both pages.
6. Publish Your First Course
- In the WordPress admin menu, navigate to ProQyz > My Courses.
- Click on Add New Course.
- Fill in the course details, including the title, description, and any relevant images.
- Set up your test series content, including questions, answers, and explanations.
- Publish the course.
Congratulations! You’ve now added a functional IELTS test series to your website.
Happy teaching, and here’s to your success in the digital education space!
